Knox Mobile Enrollment
Knox Mobile Enrollment (KME) is a solution for fast and secure bulk enrollment of corporate Android devices. The best way to use KME is to purchase a fleet of tablets or phones from an authorized reseller. All you need is to assign an MDM profile to the fleet – all devices will be automatically configured at their first start.
Before you start…
Before you start using Knox Mobile Enrollment, it is recommended to install Headwind MDM on a sample device using QR code installer, and set up a configuration (profile) in the Headwind MDM web console.
Important: use a special build of the Headwind MDM launcher as a main application. To change the main application, perform the following steps.
• Upload the APK in the “Applications” section (How to?). Register it as a “New application” and assign it only to the Knox configuration (because this build will not work on non-Knox-powered devices).
• Open the configuration details, select the “MDM settings” tab, and set the Knox build of Headwind MDM as a main application.
If you get any issues while using Headwind MDM, please contact us for assistance.
Once a sample device is up and running, you can clone your installation to a whole fleet of similar devices using KME.
1. Sign up as an IT admin on the Knox website
Open the Knox Mobile Enrollment website. To sign up, click the “APPLY NOW” button. You will need to create a Samsung account if you do not have one yet.
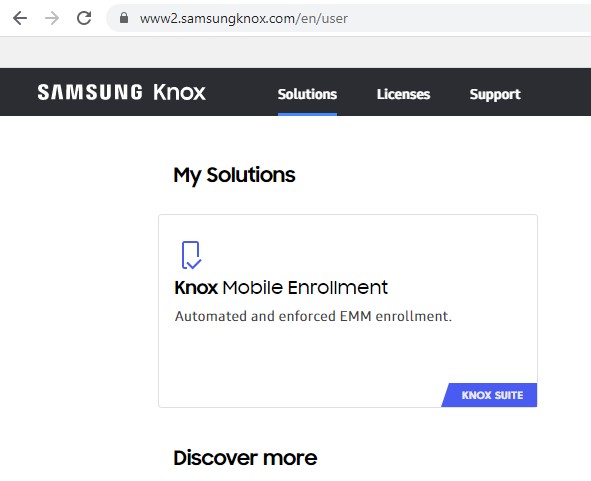
After signing up, wait for a few days until you get a confirmation email from the Samsung team. The “Knox Mobile Enrollment” option becomes available in your Knox dashboard.
2. Create a KME profile
The KME profile entity is a wrapper of an MDM configuration. The profile encapsulates installed applications, restriction policies, and other settings. It is applied to a group of mobile devices, so all of them are retrieving the same configuration from a single MDM server.
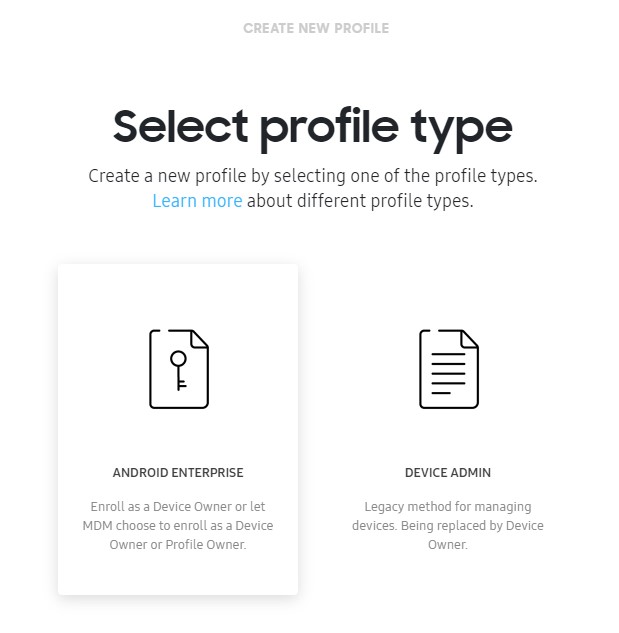
To create a KME profile, open the KME dashboard, click “MDM profiles”, and then click the “Create Profile” button.

The recommended profile type is Android Enterprise. Click the “Android Enterprise”.
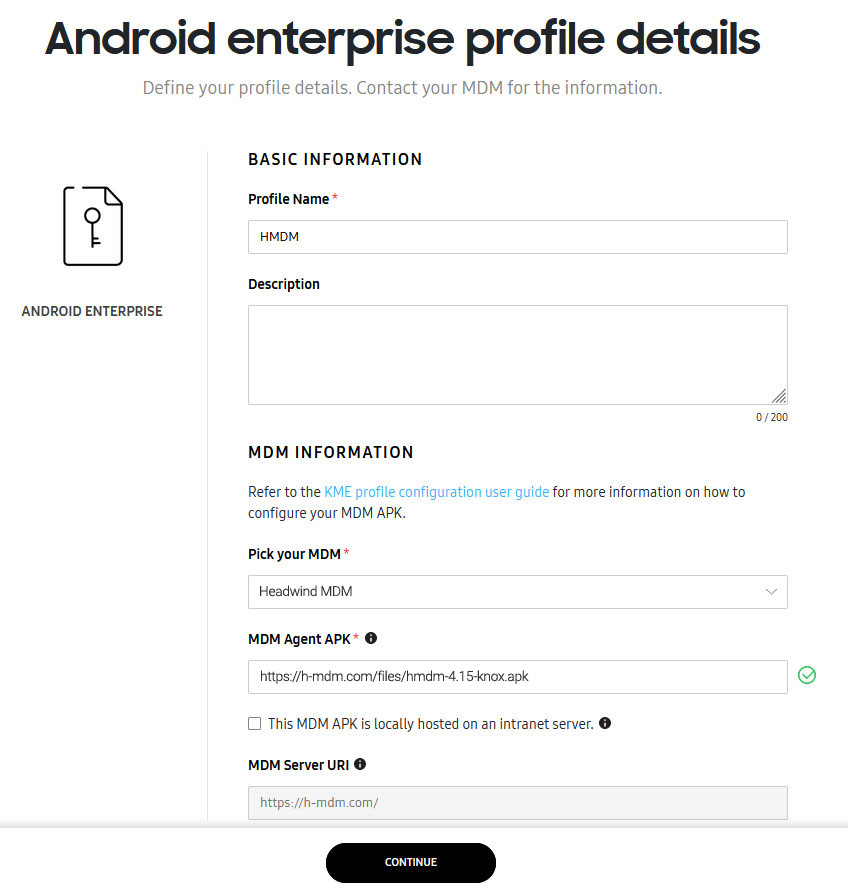
On the “Create profile” page, select “Force Device Owner Enrollment”. The MDM system should be “Other”. Enter the URL of the Headwind MDM APK (you can copy the URL from a link above). Click “Continue”.
3. Link the Headwind MDM configuration to the KME profile
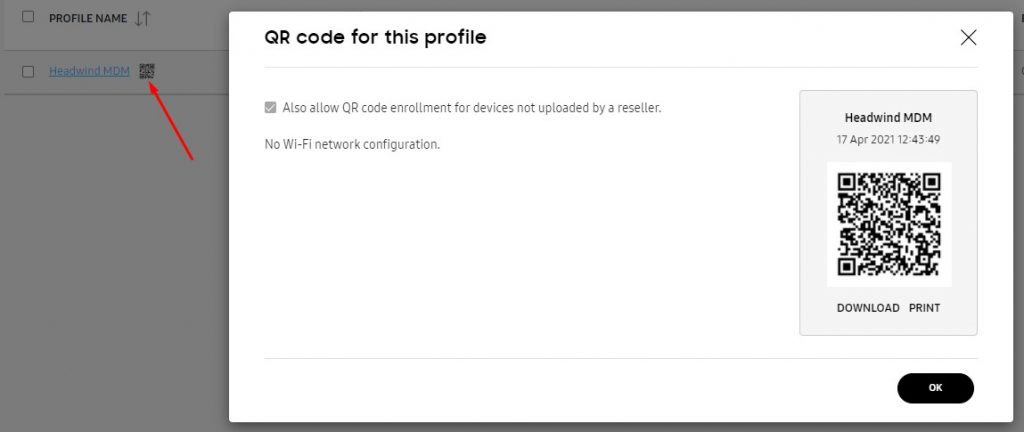
In another browser tab, open Headwind MDM, “Configurations” tab, and click the QR code icon to the right of the required configuration.
![]()
Set the checkbox “Add to device list if not exists”. Choose how the devices will be identified in Headwind MDM (available options are IMEI and Serial Number; “User Value” is not recommended because it will require user input on each device, so it must be done by an experienced user only). Optionally, assign one or more groups to the profile.

Click “Get JSON” and copy the JSON text to clipboard. This JSON needs to be entered in the KME dashboard to complete the profile setup.
4. Complete the KME profile setup
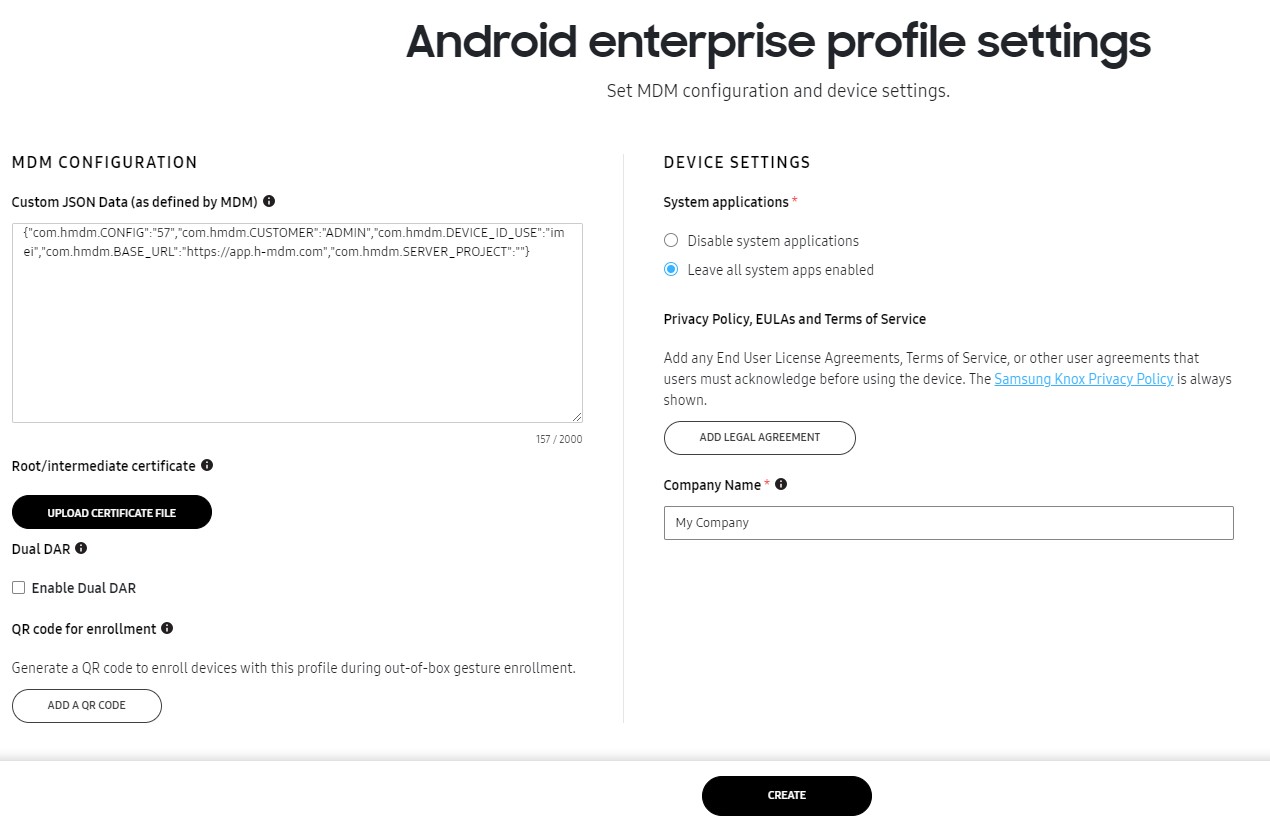
Return back to the KME profile settings page. Paste the JSON to the “Custom JSON” field.
We recommend to leave all system apps enabled (available apps will be managed by Headwind MDM).
Type the company name, it will be displayed on a device during the enrollment.
To enable QR code based enrollment, click “Add a QR code” and set it up (we recommend to set the checkbox “Also allow QR code enrollment for devices not uploaded by a reseller”).
Click “Create” to complete the setup.
5. Choose the enrollment type
The following enrollment types are available in KME:
- Authorized reseller (recommended). Once you purchased a fleet of mobile devices from an authorized reseller, devices are automatically displayed in your KME panel. All you need to do is to assign the MDM profile. The brand new devices will be configured after turning them on.
- QR code. To create a QR code, open the profile details in the Knox dashboard, and click “Add a QR code”. The QR code icon will appear in a profile list, click it to display the code. Notice: this QR code is used by Knox devices only, it WILL NOT WORK as an Android enrollment QR code! More details about Knox QR code enrollment are available here.
- Knox deployment app. You can use a dedicated device (enrollment station) for bulk enrollment. This method can be used for both new and existing devices. The enrollment is performed via NFC, Bluetooth, or WiFi Direct.
6. Set up (enroll) your devices
Authorized reseller
Open the Knox dashboard and select “Devices”.
Once you purchase a fleet of mobile devices from an authorized reseller, you must get a list of available devices in the “Devices” section of the KME dashboard. Select the required group of devices, click “Actions” – “Configure devices” and assign the MDM profile to them. The devices are ready to be enrolled. The enrollment will be done automatically at the first start.
QR code
Sign in to the KME dashboard and select “MDM profiles”. You will see a QR code icon, click it to open a QR code. If you do not see the icon, open the profile and click “Add a QR code” in the profile settings, then return back to the list of profiles.
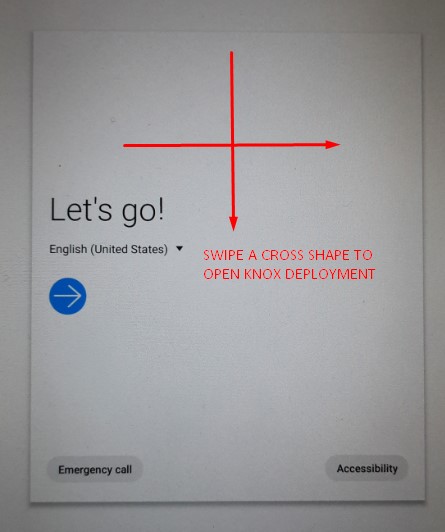
On a brand new device, swipe a cross shape on a welcome screen to open the hidden Knox enrollment menu.
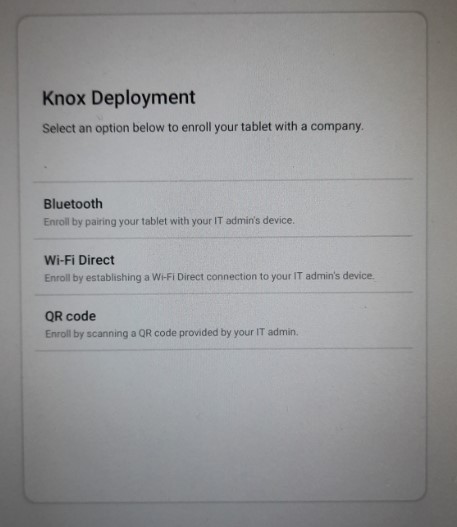
Select “QR code” and scan the QR code to complete the enrollment.
Knox Deployment app
This method applies to devices purchased from an unauthorized reseller, either new or already configured.
To enroll these devices, you need to set up an “enrollment station” – an NFC-capable or Bluetooth-capable Samsung device.
Open Google Play on the device and search for “Knox Deployment”. Install and run the application. Sign in by using your Samsung account (KME must be already enabled).
Click “Profile” and select the profile you want to enroll. Then click “Deployment mode” and choose how would you like to enroll (Bluetooth, WiFi or NFC).
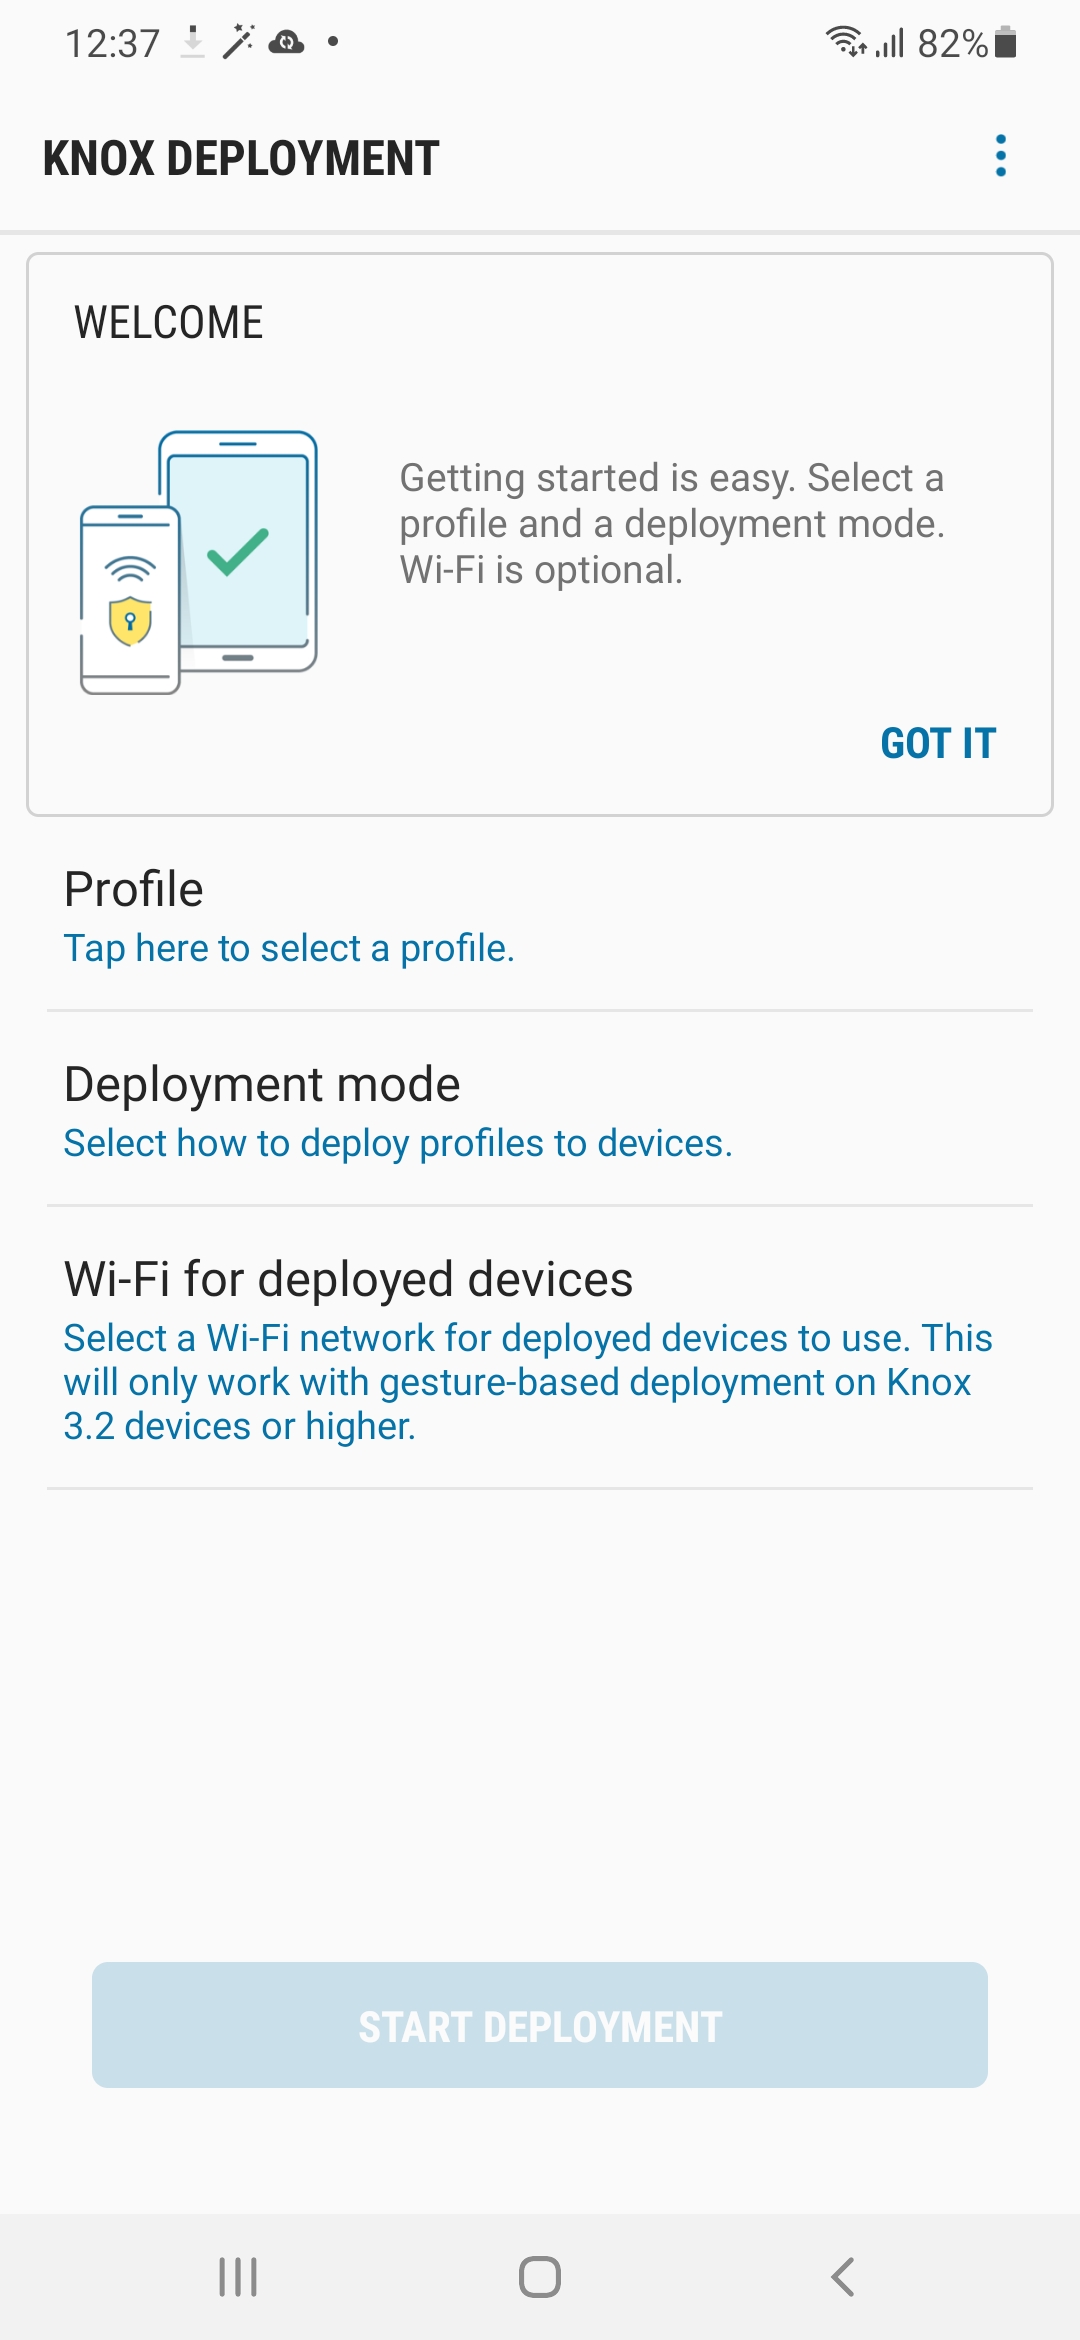
Click “Start deployment”. Enable Bluetooth on the device if required.
On a brand new device, open the hidden Knox enrollment mode by drawing a “cross” on the welcome screen. Select “Bluetooth” or “Wi-Fi Direct” to proceed with the deployment.
Notice: KME enrollment support for Device Admin is no longer supported on Android 11 or above. Therefore, we do not recommend enrolling a device which has been already setup for personal usage. Reset the device to the factory defaults to enroll via KME.
7. Finalize the setup
During the enrollment, the device may ask the user to setup WiFi, and agree with some terms and conditions. All you need to do is to tap “Next” and agree with terms and conditions.
Once the setup wizard will be completed, the device may behave in one of the following ways:
- Headwind MDM will be automatically started. All you need to do is to agree with Samsung Knox terms and conditions when Headwind MDM will activate the Knox license. After you get the Headwind MDM desktop, click Home to make sure Headwind MDM is set as a default launcher.
- The device will ask you to choose the launcher (either a standard launcher or Headwind MDM). Tap “Headwind MDM” and then tap “Always”. Then wait until Headwind MDM configures the device.
- A standard launcher will be opened. In this case, you need to swipe up to open “All applications”. Find “Headwind MDM” and run it. The app should configure the device. After the setup is completed, click Home to make sure Headwind MDM is set as a default launcher.
7. Manage your devices
Once a setup is completed, the devices will appear in both Knox and Headwind MDM dashboards.
The device configuration (policies, applications, etc) are managed in the Headwind MDM dashboard. The KME is only used for initial deployment and device accounting purposes.